
WordPress recently announced a new add-on that will make it easier for businesses and bloggers to create content directly from the Google Docs application. The WordPress.com add-on for Google Docs seamlessly integrates a WordPress website with Google Docs allowing publishers to create, edit and save their posts without having to sign into their website.
Benefits of the Google Docs Add-on
The add-on has many benefits for individuals already familiar with the Google Docs interface. People in charge of creating content for their blogs or company website no longer need to login to WordPress to create the new articles. They can simply use their Google accounts to create the content, save a draft copy to WordPress and even collaborate with their colleagues on changes.
Another added benefit is the ability to use images that have been uploaded to Google Drive. Images can be embedded directly into the article without having to first upload them to WordPress. Once the article is saved to WordPress, all the content including any media will be automatically synced to the WordPress site as well.
Companies outsourcing their content creation to a third party can make use of the add-on to collaborate on creating articles for their website. The content creators can create the articles in Google Docs and receive feedback from their clients without ever requiring login access to the WordPress website.
Finally, if you’ve ever lost your work and have spent precious time trying to recreate it, one of the benefits of using Google Docs is that it automatically saves your work in real time. Unlike WordPress, which only saves your work every so often, there is a risk of losing your work if your browser crashes or if you lose your connection to the internet.
To test out the functionality, this blog post was created using the WordPress.com add-on for Google Docs. Read on to find out how you can integrate the add-on to create content for your WordPress website.
Step by Step Installation Guide
To make all of this possible, we first need to install the Google Docs add-on. To get the add-on, head over to the Google web store. Click on the Free button at the top of the page to install the add-on.

After the add-on finishes installing, you will see a message letting you know you can now add your website.

Click on the Add-ons menu, mouse-over the WordPress.com for Google Docs option, and then select “Open”.

In order to allow Google Docs to publish content to your WordPress website, you need to first authorize it to talk to your website. Click the Authorize button to add your website.

Before you can integrate the WordPress.com add-on for Google Docs with your website, you need to have a WordPress.com account.
If you already have an account, go ahead and login with your WordPress.com credentials. Keep in mind, this is not your own website’s login info.
If you don’t have a WordPress.com account, click on the “Create an Account” link to create one.
Once logged into WordPress.com, you will see a list of websites that are linked to your account.

If you see a screen saying that you have no WordPress.com sites, this means your website is not hosted with WordPress.com. Your website is being hosted with a different hosting provider. This is referred to as self-hosting.
To enable the integration of the WordPress.com add-on for Google Docs on self-hosted websites, you need to download and activate the Jetpack plugin first. Jetpack is a plugin developed by WordPress that includes a range of tools to manage, secure and backup WordPress websites.
To install Jetpack, head over to your website, and login to your admin panel (also referred to as the Dashboard). Once logged in, click on the Plugins link in the left sidebar and then click on Add New. The Jetpack by WordPress.com plugin is usually listed as one of the Featured plugins. If you don’t see it, simply enter “jetpack” in the search box to find it.

Click on the Install button to download and install the plugin on your website. Once installation is complete, Activate the plugin.

Once activated, you will need to connect your website to WordPress.com. Click the blue “Connect to WordPress.com” button to get the process started.

If you’re still logged into WordPress.com from one of the previous steps, you will see a screen instructing you to Approve the connection to your site. If you’re not logged into WordPress.com, you will need to log in first.

After you Approve the connection, Jetpack will ask you to select one of the plans they offer. You don’t need any of the paid plans to use the WordPress.com add-on for Google Docs. Select the free plan to activate your membership.

Jetpack has a lot of features that you can use for managing your WordPress site. For the purpose of this article, simply click on “Skip this step” to move on.
Now, switch back to Google Docs and click on the Authorize button one last time. If you closed the Google Docs window, don’t worry. Open Google Docs in your web browser, start a new document and click on the Add-ons menu. Click WordPress.com add-on for Google Docs and select “Open”. You will now see the Authorization panel. Click Authorize.

This time you will see a screen listing the access permissions the add-on requires. These permissions are necessary to connect Google Docs to your WordPress site. Once you’ve reviewed the instructions, click on Approve.

To complete the process, you will need to log in to your WordPress website. Enter your website admin credentials to proceed.
Finally, head back over to Google Docs to make sure the authorization process worked. You should now see your WordPress website listed.
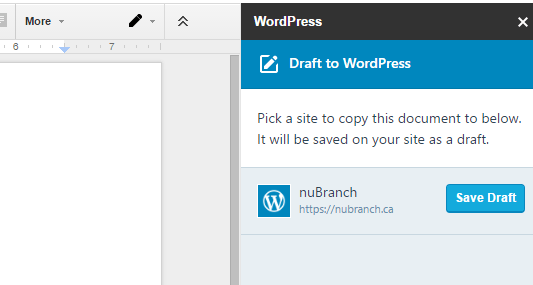
You can now test the add-on. Start typing into the Google Docs document window, add a heading and a few images. Make sure to give your document a title – this will become your article’s title in WordPress. Once you’re done, click on the Save Draft button. Switch back to your website, and go to the Posts section. Your article will be in Draft status. You can review the article and make any final adjustments before publishing it.
Final Thoughts
The WordPress.com add-on for Google Docs can save companies and bloggers a lot of time. They don’t need to log into the WordPress dashboard in order to start a new article. Companies can collaborate with third party content creators in real-time on creating articles for their website. Writers can also save time by not having to worry about uploading their media to WordPress first in order to use them in their articles. If you are not a fan of the built-in WordPress text editor, typing your article directly into Google Docs means you can use an editor you are already familiar with.